
This post introduces the technologies I am using to build this site, explains why I decided to use Hugo on AWS Amplify, and contains everything you need to know to create a website for yourself!
Hugo
What is Hugo?
Hugo is an extremely fast, flexible, and fun open-source static site generator. It offers an ecosystem of themes and simple yet robust templating using Go. Jeff Delaney, the creator of fireship.io (a site powered by Hugo), posted an insightful two-minute video on what Hugo is and how to get started.
Why I Chose Hugo
I was interested in the idea of building a site to share knowledge, record progress, deepen understanding, showcase projects, and learn to communicate more effectively through blogs and articles. Hugo made a lot of sense to me as a developer familiar with markdown and templating engines, as it allows for endless room for customization in the future. Most importantly, its frictionless setup allowed me to channel my time and energy into creating content over building a website.
Setting up Hugo
-
Read the Getting Started section of Hugo’s documentation.
-
Create a Git repository and create your Hugo website with some content. Have fun with this! You may want to add static files, configure Google Analytics, or add a theme.
-
Add a
.gitignorefile to your projects directory to ignore files that Amplify doesn’t need to build your site; here is my setup:# Generated files by hugo /public/ /resources/_gen/ /assets/jsconfig.json hugo_stats.json # Executable may be added to repository hugo.exe hugo.darwin hugo.linux # Temporary lock file while building /.hugo_build.lock
AWS Amplify
What is Amplify?
Amplify is a popular service enabling developers to build applications rapidly. Amplify acts as a layer of abstraction on top of core AWS services, reducing configuration time and lowering the barrier to entry for adopting cloud technology.
Why I Chose Amplify
For deploying a Hugo website, these features are convenient:
- Continuous integration and continuous delivery workflows.
- Easily add a custom domain and install an SSL certificate.
- Deploying test versions of the site using feature branches.
- Hosting through Amazon CloudFront, a low-latency and secure CDN.
Other static site hosting services such as GitHub Pages, Netlify, and Firebase offer similar features. However, I chose to use Amplify because I was interested in learning about Amplify most, as I may use it for future projects.
Setting up Amplify
-
Create an AWS account. As of August 2022, the core features for hosting and building sites using static site generators are free tier eligible.
-
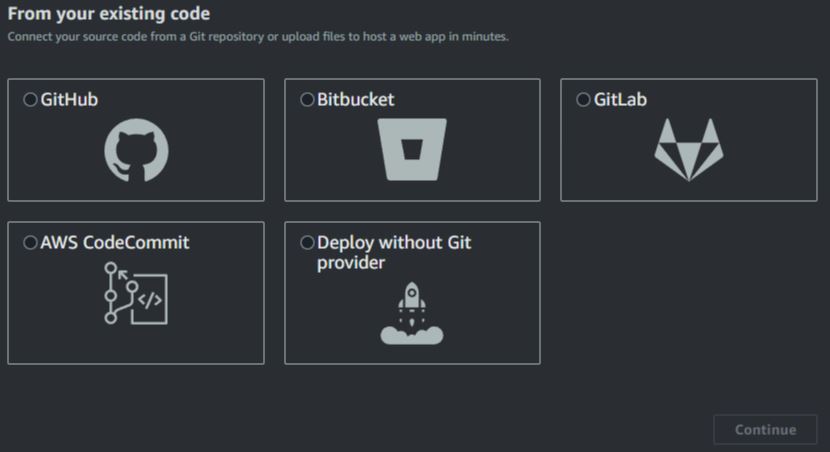
Launch the AWS Amplify Console and click
Get started.
-
Import your existing Git repository and select a branch. When you push to this branch, it will automatically provision a build environment and build & deploy the application to a CDN.
-
Set your app name and update your build and test settings. These settings will tell Amplify how to generate your site and which files we want to deploy.
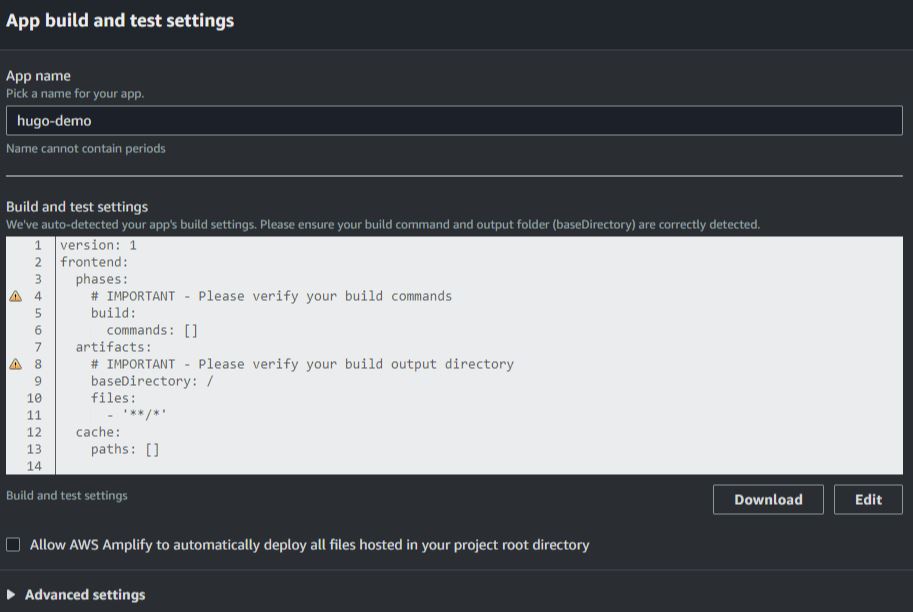 Click
Click Editand use the following configuration:version: 1.0 frontend: phases: build: commands: - 'hugo' artifacts: baseDirectory: './public' files: - '**/*' cache: paths: [] -
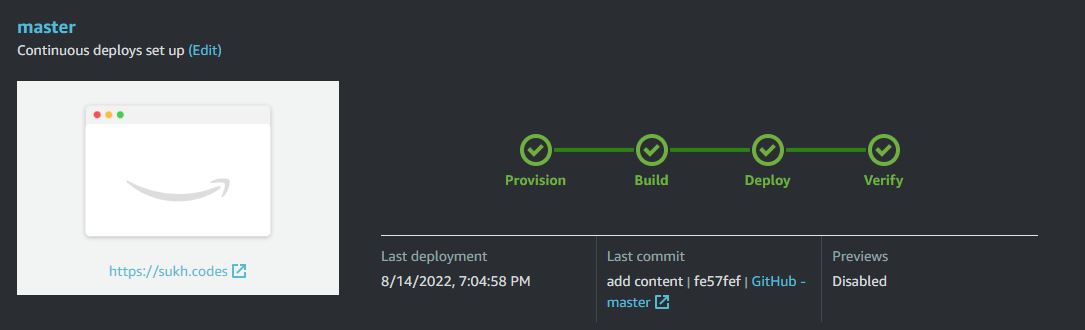
Give AWS a few moments to build and deploy your website, and viola - your creation is alive! To update your site, push changes to the specified branch and let Amplify’s auto-builds take it from there.
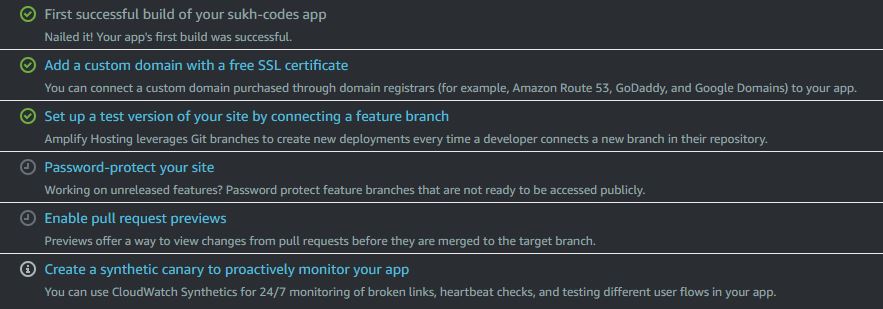
Additional Setup
-
Follow Amplify’s onboarding guide for instructions on how to get the most out of Amplify Hosting. This guide will step you through using a custom domain name and using feature branches to deploy test versions of your site.
-
The host instance’s Amazon Machine Image (AMI) likely uses an old version of Hugo. Using the same Hugo version locally and on AWS is recommended for consistency and to prevent build errors. Find your local Hugo version using the command
hugo version. Then update your AWS build image’s Hugo version to match your local version by clicking:Build settingEditin theBuild image settingspanelAdd package version override
Conclusion
And there you have it! I hope I have shown how easy it is to create a fast, flexible, and fun website.